Friday, 19 August 2016

Hi everyone!

Okay, so it's been forever since my last post and you're all going, "Great, what excuse does she have this time?" No excuses- I forgot.......I ate all my delicious treats and then realized I hadn't blogged about it. So sad.

Well, as proof I have the last two remaining shortbread cookies. Now you're skeptical because gluten free shortbread? I mean, really? But hear me out! Way back when, flour actually had less gluten and a different version of gluten in it, so shortbread really didn't have that much gluten to begin with. This tastes to me like real old-fashioned homemade shortbread, so give it a chance!

Ah, but they're not alone--oh no, I have included my new favourite summertime drink: homemade chai tea. There are a thousand and one versions of chai tea, this was simply the first I tried. I happened to love it so I haven't tried any more....yet.

All the best in trying these recipes!


Scottish Shortbread
Ingredients
2 cups of 1-1 gluten free flour
¾ cup butter
½ cup sugar

Method
Preheat oven to 350F. Combine all three ingredients and mix with the paddle attachment- I used a spoon and essentially just cut the butter in, modelling the dough together. Continue until a dough begins to form. 
Press into an 8x8 pan. Bake until cooked through and lightly browned, about 30 minutes

Chai Tea
Ingredients
8 cups water
8 bags black tea (orange pekoe)
¾ cups sugar (to taste- I actually prefer less sugar)
16 whole cloves
16 whole cardamom seeds (with or without the pods)
5 cinnamon sticks
8 slices of fresh ginger

Method
Combine all ingredients in a slow cooker and cook on high for 2-2 ½ hours. Strain mixture and discard solids. Serve warm or chilled.
*Tea can be refrigerated for up to three days. (I personally like it best the day after). 


Tuesday, 28 June 2016

Quinoa Bread

Welcome back everyone!

          It has been a busy last couple of....months? Anyway, with summer finally here I thought it might be nice to throw in a slightly more time consuming- but even more rewarding recipe! Ladies and gentlemen, I give you Quinoa Bread (completely gluten free, recipe included).
          This bread is soft, deliciously homemade and treacherously addictive. The difference between gluten-inclusive bread and this gluten-free bread is mainly in the texture. The texture is soft, almost spongy but still manages to "feel" like bread.
         I dare you to step outside your comfort zone and try it.
Ingredients

2 tbsp sugar
1 tbsp dry yeast
1 ½ cups warm water
1 cup brown rice flour
¾ cup tapioca flour
¾ cup quinoa flour
¾ cup cornstarch
1 tbsp xanthan gum
1 tsp baking powder
1 tsp salt
¼ cup canola oil
1 tsp vinegar
2 large eggs, lightly beaten

Method
          Dissolve sugar and yeast in 1 ½ cups of warm water. Let stand for 5 minutes.
Combine flours, xanthan gum, baking powder and salt in a large bowl.
          Combine canola oil, vinegar and eggs. Add to dry ingredients. Add in yeast mixture. Stir until well blended.
          Pour “batter” (it is more batter like than dough like in its consistency ) into a 9x15in loaf pan and cover with plastic wrap. (Spray the plastic wrap with cooking spray to prevent dough from sticking). Let rise for about  hour or until doubled.

         Bake at 375 fir 45 minutes or until top is golden and bread sounds hollow. Cool before slicing. 

Saturday, 30 April 2016

Cinnamon Rolls

Let's -just for a moment- take a step out of our healthy, vegetable filled lives and remember the deliciously sweet smell of butter and sugar baking away in the oven. You walk into the kitchen and you heart just melts within you.

You can have all that once again.

Ladies and gentlemen, I give you: gluten free super easy cinnamon rolls- no waiting, no fuss and no gluten!

Cinnamon Rolls -Emily style

*there are only five because my family got to them before my camera did....this recipe makes a dozen

So here's the recipe. I've added my own tips and tricks throughout just to make life easier. 

Cinnamon Rolls

Ingredients
2 cups Gluten free 1-1 flour
2tbsp granulate sugar
4tsp baking powder
1/2 tsp salt
¼ cup cold butter
1 cup milk

1/3 cup butter
1 cup packed brown sugar
3 tsp cinnamon
1/3 cup raisins

Method

In a large bowl combine flour, sugar, baking powder and salt. Cut in butter until crumbly. Make a well in the center and add milk, slowly stirring to form a soft dough, add more milk if necessary. Knead on a lightly floured surface until dough is smooth. Roll out into a rectangle about 1 cm (1/3 inch) thick and 30 cm (12 inches) long.
*Note: gluten-free flour may not stay together the way other flours do when rolled. To prevent the dough from breaking apart, place lightly-floured wax paper on either side of the dough and then roll. This should prevent any separation.

In a separate bowl, cream butter, brown sugar and cinnamon. Drop 1 tsp into each of the 12 greased muffin tins. Spread the remaining mixture over the dough. Sprinkle raisins over top
*Note: to make raisins juicer, boil water and cover raisins for 5-10 mins. Drain raisins before using them.

Roll lengthwise, like a jelly roll and cut into 12 slices. Place each in muffin tins. Bake at 400F for 20-25 minutes. 


Sunday, 27 March 2016

Happy Easter

Happy Easter!

Today I bring to you a recipe i made for tonight's Easter dinner. I may have taste tested it a bit.....but they'll never know.....This chocolate cake recipe is 100% delicious and is both vegan and gluten free! Take my word- this chocolate cake is simply stunning.

The recipe came from another blog: the Minimalist Baker (http://minimalistbaker.com/one-bowl-vegan-chocolate-cake/). The only changes I made were to use 1-1 Gluten free flour mixture in the cake and water in the icing (instead of almond milk).

Indulge and enjoy!


Ingredients:
CAKE
  • 1 1/2 cups (360 ml) original unsweetened almond milk
  • 2 tsp apple cider vinegar
  • 1 1/4 cups (307 g) unsweetened applesauce
  • 1/2 cup (120 ml) strong brewed coffee (espresso) (or sub more almond milk)
  • 2/3 cup (160 ml) canola oil
  • 2 tsp pure vanilla extract
  • 2 cups + 2 Tbsp (320 g) 1-1 Gluten free flour mixture 
  • 1 1/3 cups (266 g) organic cane sugar (or sub granulated sugar)
  • 1 cup (96 g) unsweetened cocoa powder
  • 2 tsp baking soda
  • 1 tsp baking powder
  • 1/4 tsp salt
FROSTING
  • 1 cup (16 Tbsp or 224 g) vegan butter, softened
  • 2 1/2 - 3 cups (280-336 g) powdered sugar
  • 2/3 cup (63 g) unsweetened cocoa powder
  • 1/4 cup (30 g) dairy-free semisweet chocolate, melted and slightly cooled
  • 2 tsp pure vanilla extract
  • ~1/4 cup water
Instructions
  1. Preheat oven to 350°F (176 C) and lightly spray 2 8-inch round cake pans or one large rectangular pan with nonstick spray (see notes for cooking times for different size pans). Dust with cocoa powder, shake out the excess and set aside.
  2. Mix the almond milk and vinegar in a large mixing bowl, and let set for a few minutes to activate. Add the oil, coffee, vanilla extract, and applesauce and beat until foamy.
  3. Add the flour, sugar, cocoa powder, baking soda, baking powder, and salt to a sifter and slowly sift over the wet ingredients while mixing with a hand-held or standing mixer. If you don’t have a sifter, simply mix dry ingredients in another bowl and add to the wet mixture while beating. Beat until no large lumps remain. It should be creamy and pourable. Taste and adjust sweetness as needed, adding more sugar if desired (I found it plenty sweet).
  4. Divide batter evenly between your 2 cake pans or rectangular pan.
  5. Bake 25-30 minutes, or until a toothpick inserted into the center comes out clean. Let cool completely before frosting.
  6. While cooling, prepare frosting by beating together all ingredients until light and fluffy, adding the powdered sugar in small amounts until you reach your desired consistency and sweetness. If it becomes too thick, add more water. If it's too thin, add more cocoa powder or powdered sugar.
  7. Once the cake is cooled, frost generously with buttercream frosting, adding a thick layer between the top and bottom layers (if doing a 2-layer cake). Alternatively, omit the frosting and dust with cocoa powder.
  8. Serve with a scoop of dairy-free ice cream, a drizzle of chocolate or caramel sauce, coconut whipped cream or a glass of almond milk!


Tuesday, 15 March 2016

Tasty, Flavourful and Healthy?!

Gasp. Healthy? Could it be? No, there's no way something this delicious could be so healthy.

But it's true.

Allow me to introduce you to.......drum roll please.....Roasted Chickpeas!

Whether you're looking for a sugar-free, gluten-free, peanut-free (what's with all the frees?) school snack, an after-gym snack, an I'm-bored-what-do-we-have-in-the-fridge snack, these chickpeas are for you!

Now, I have to be honest, I got this recipe off another website (thekitchn.com), specifically http://www.thekitchn.com/how-to-make-crispy-roasted-chickpeas-in-the-oven-cooking-lessons-from-the-kitchn-219753 but they were so tasty I just couldn't NOT blog about it.
And if we're being honest, the chickpeas almost didn't make it into the picture- they were that good. 
So here you go: a mouth-wateringly yummy, healthy, vegan, gluten-peanut-sugar free snack just for you. Enjoy snacking!


Ingredients
2 15-ounce cans chickpeas
2 tablespoons olive oil
1/2 to 3/4 teaspoon salt
2 to 4 teaspoons spices or finely chopped fresh herbs, like chili powder, curry powder, garam masala, cumin, smoked paprika, rosemary, thyme, or other favorite spices and herbs
EquipmentCan opener
Strainer
Dishtowel or paper towels
Measuring spoons
Baking sheet

Instructions

  1. Heat the oven to 400°F: Place an oven rack in the middle of the oven.
  2. Rinse and drain the chickpeas: Open the cans of chickpeas and pour the chickpeas into a strainer in the sink. Rinse thoroughly under running water.
  3. Dry the chickpeas: Pat the chickpeas very dry with a clean dishtowel or paper towels. They should look matte and feel dry to the touch; if you have time, leave them to air-dry for a few minutes. Remove any chickpea skins that come off while drying, but otherwise don’t worry about them.
  4. Toss the chickpeas with olive oil and salt: Spread the chickpeas out in an even layer on the baking sheet. Drizzle with olive oil and sprinkle with salt. Stir with your hands or a spatula to make sure the chickpeas are evenly coated.
  5. Roast the chickpeas in the oven for 20 to 30 minutes: Stir the chickpeas or shake the pan every 10 minutes. A few chickpeas may pop – that’s normal. The chickpeas are done when golden and slightly darkened, dry and crispy on the outside, and soft in the middle.
  6. Toss the chickpeas with the spices: Sprinkle the spices over the chickpeas and stir to coat evenly. Serve while the chickpeas are still warm and crispy. They will gradually lose their crispiness as they cool, becoming addictively chewy.

Recipe Notes

  • Besides eating these chickpeas as a snack, you can toss them with salads or sprinkle over soup in place of croutons.

Wednesday, 24 February 2016

MMMMMMMUFFINS

Guess what? It's snack time -gluten free, of course!
One of my all time favourite snacks is muffins! I have so many I like that picking a favourite muffin is hard work. Here's one of my all time favourties -Gingerbread Pear!

Gingerbread Pear Muffins

Ingredients
2 cups 1-1 gluten free flour mix
¼ cup granulate sugar
1 tsp baking powder
1 tsp baking soda
1 tsp ginger
1 tsp cinnamon
½ tsp cloves
½ tsp salt
¾ cup molasses
¼ cup oil
2 eggs
1 cup buttermilk (almost 1 cup of milk + about 1 tbsp lemon juice, sit for about 5 minutes)
1 pear or apple, peeled, cored and chopped

Method
Stir together flour, sugar, baking powder, baking soda, cinnamon, ginger, cloves and salt in a large bowl. In another bowl beat together milk, molasses, oil and eggs. Add milk mixture to flour mixture and stir until just combined. Fold in pear. Bake at 375F for 20-25 minutes.

*can keep batter in a sealed container in the fridge for up to 5 days.

Sunday, 31 January 2016

Winter Delights

Hey everyone!
          It's been a while since my last posting so I thought that I'd make this posting a special one. This recipe is by no means sugar free. It is just simple, honest comfort food.
      Note: In this picture, everything you see is gluten free. In a future post I will most certainly expand on these recipes, but there is a pattern: I usually use 1-1 gluten free baking flour as a substitute for all purpose white and whole wheat flour. This has worked well for most of my recipes (although I do occasionally modify them) and in many cases I find the result to be a lighter, tastier version of my favourite foods. Feel free to try this with your favourite recipes- you may find it a welcome change!

Date Loaf, Banana Muffins and Em's Best Brownies 

Em's Best Brownies

Ingredients
1 cup plus 2 tbsp butter
1 ½ cups granulated sugar
2 eggs
1 ½ tsp vanilla
2/3 cup cocoa
2 tsp baking powder
½ tsp salt
1 cup semi-sweet chocolate chips

Method
            Melt butter in medium saucepan over low heat. Remove from heat and stir in sugar. Add eggs, one at a time, beating with whisk until smooth. Stir in vanilla. Mix flour, cocoa, baking powder and salt Stir into butter mixture. Add chocolate chips.

            Pour into a greased 9x13 pan. Bake at 350F for about 25 minutes or until cracked. 


*Really like icing? Want that extra little bit of sweetness? Try Fry's Chocolate Sauce! 
     This sauce keeps in the fridge for a few days and is easily reheated in the microwave (provided you don't first put it on the ice cream....). 

Ingredients
2/3 cup sugar
½ cup cocoa
½ cup water
½ cup butter
1 tsp vanilla

Method
Combine sugar and cocoa in a small saucepan. Stir in water. Stir over medium heat until mixture comes to a boil. Reduce heat and boil gently for 3-4 minutes. Remove from heat. Add in butter and vanilla.
Makes about 1 ½ cups. 


Sunday, 17 January 2016

Chewy Goodness -Nut Free For School!

Peanut free? Challenge accepted!
     If you've read my first blog post on peanut butter cookies it is quite apparent that I have no aversion to peanuts, in fact, I love peanut butter so much I once went a whole month eating nothing but PB&J sandwiches for lunch.
     Unfortunately, peanut butter is not always an option. Anyone who has a peanut allergy, or knows someone with a peanut allergy, has to be exceedingly careful of what they make and eat. Since the recipe for Goody Two Chews is my favourite snack food recipe, I'm not about to give it up - but that doesn't mean I won't change it.
     I've removed the peanut butter, added more fruit, and a little extra honey and voilà- they're better than they were before! 


Goody Two Chews - Peanut Free!

Ingredients
1/2 cup honey or maple syrup*
2 egg whites
1 tsp pumpkin pie spice
2 ½ cups granola
¾ cup dried cranberries
¼ cup raisins
¼ cup chopped dried apricots**

Method
            Preheat oven to 250F. Beat honey/maple syrup, egg whites and pumpkin pie spice until smooth. Stir in granola, cranberries, raisins and apricots. Divide into muffin tins and pack down softly. Bake for 45 minutes. Cool completely before removing from pan.

*I really like buckwheat honey in this recipe
**You can add any type of dried fruit you like, you just have to remember that adding too much fruit may make a super crumbly granola bar.


Side note: looking for more of a muffin than a granola bar? Try adding apple sauce! It tastes delicious and is less likely to crumble- but be careful, too much apple sauce will make the ‘muffin’ soggy. I recommend adding about ¼ - ½ cup of apple sauce. 


Saturday, 16 January 2016

Chewy Goodness

I've made you wait, given you a granola recipe and by now you're going, huh??
But here it is: my favourite snack of all times!

Goody Two Chews
     These healthy, delicious tasting snacks are the perfect hold-me-over when driving home from work or finishing a hard day at school. You can even freeze them for a rainy day! Goody Two Chews are light but packed with protein and fruit- a delightful combination. 
     This snack beats granola bars by a mile because you know what you put in them. 

Enjoy! 

Ingredients
1/3 cup natural peanut butter
1/3 cup honey or maple syrup
2 egg whites
1 tsp pumpkin pie spice
2 ½ cups granola
¾ cup dried cranberries

Method

            Preheat oven to 250F. Beat peanut butter and maple syrup. Add egg whites and pumpkin pie spice and beat until smooth. Stir in granola and cranberries. Divide into muffin tins. Bake for 45 minutes. Cool completely before removing from pan. 

Sunday, 10 January 2016

The Beginning Of All Good Things

Hi everyone,

       I recently posted about muffins and cookies -great snack foods and if they're healthy, well that's even better! I had a request for sugar free snacks, and I do have a few of those up my sleeve but I thought I'd start with the base for some of those delicious snacks. Granola.
       There's so many granolas out there that I could live to be 1000 and probably wouldn't be able to try them all. So what makes this granola different?
Well, for starters -it's homemade. You know exactly what is in it; gluten free, peanut butter free, egg free, no hidden calories, fats or oils, only what you put in. Secondly, it makes a lot of granola and you can store it in the freeze both prior to cooking it and after you cook it. Finally, it tastes delicious.
       Why tell you this? It's great as a cereal or muesli in the morning, as a lunch-time snack with fruit or as a I'm-craving-need-munchies-NOW food and it makes great snacks when combined with other food stuffs (more on this in a later post).

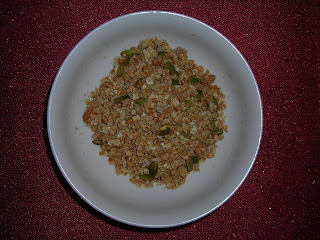
Granola

So here's my recipe for granola:  

Ingredients
5 cups rolled oats (GF)
1 cup oat bran
1 cup raw sunflower seeds, hulled
1 cup unsweetened coconut
½ cup raw sesame seeds
¾ cup honey or maple syrup
¾ cup oil

Method
Mix all ingredients except honey and oil together*. Add honey/maple syrup to mixture and stir thoroughly. Spread across a large baking sheet. Bake at 325F for 10 minutes, remove from oven and stir. Return to oven for another 10 minutes. Repeat process about 4 times (about 40 minutes) or until granola is a light golden brown colour. Feel free to add nuts, dried fruit or anything else you love in granola!

*If waiting to cook: freeze all these ingredients in a container for later use.

Note: maple syrup seems to make the granola slightly less clumpy than the honey. 

Wednesday, 6 January 2016

Mix and Mash Cookies

Hi all!

I have a great recipe here that is healthy, delicious and takes all of 2 ingredients! Don't believe me? Take a look:

Mix and Mash Cookies

Ingredients: 
2 large bananas
1 cup oatmeal (GF if needed)
*coconut, raisins, walnuts, your favourite ingredients etc. 

*these are all optional ingredients. I like adding the coconut, it gives it a different texture. 

Method 
    Mash ripe bananas. Add oatmeal and stir until completely coated. Add favourite ingredient. Bake at 350F for 13-15 minutes, until starting to crisp on the bottom. 

Sunday, 3 January 2016

Homemade Gluten Free Snacks

Hi everyone,

         It occurs to me that those of us lucky enough to get a bit of a longer holiday break are about to go back to our regular routines and some of us are already there. It often seems a bit depressing to go back to normalcy after a few days off so to get away from all the down feelings why not create something new? A just-for-you gluten free snack: muffins!
         One of my favourite muffins is the lemon poppy seed muffin. It comes in many forms and many different recipes but I love this recipe because it is quick, easy and healthier than some of the other recipes I've seen! Takes maybe half an hour, no more. 

Lemon Poppy Seed Muffins

Lemon Poppy Seed Muffins

Ingredients
½ cup granulated sugar
1 tsp baking powder
1 tsp baking soda
¼ tsp salt
¼ cup poppy seeds
1 egg lightly beaten
¾ cup milk
¼ cup vegetable oil
Grated rind of 1 or 2 lemons
¼ cup lemon juice

Method

In a large bowl combine flours, sugar, poppy seeds, baking powder, baking soda and salt. In a separate bowl mix eggs, milk, oil, lemon rind and lemon juice. Pour into flour mixture and stir until just moistened. Don’t over mix. Bake at 375F for 15-20 minutes. 

Makes a dozen muffins. 

Friday, 1 January 2016

Happy New Year

HAPPY NEW YEAR!

Congratulations everyone, we've made it through another year! I wish you all a happy new year.
         I could ramble on for hours about goals, resolutions, traditions and everything in between but I think you've heard it all- and really, I'm only interested in sharing with you my love of baking: 

Ginger Cookies

        Ginger has long been regarded as a highly medicinal plant. One of it's common uses is to treat the upset stomach. Whether it be fresh ginger root, ginger tea or flat ginger ale (a frequently used remedy in my household) ginger is often seen as a cure-all. But in almost all societies ginger has also taken on another role -flavour. In cookies, cakes, curries and more ginger has become a wonderfully used spice. So in honor of the new year and a flavourful yet healthy start here is a ginger cookie recipe. These can be both snaps and soft ginger molasses cookies depending on how you roll them out. 

Ginger Cookies
Snappy or Soft


Ingredients
½ cup butter
1 cup molasses
1 tsp baking soda
3 tsp boiling water
1 tsp cinnamon
3 tsp ginger
¼ tsp cloves

Method
In a small sauce pan melt butter. Add molasses and bring to boil, stirring steadily. Remove from heat. In a small bowl dissolve baking soda in boiling water. Add to molasses mixture. Set aside to cool for 15 minutes.
        In a mixing bowl sift 2 cups of flour, ginger, cinnamon and clove. Stir in cooled molasses mixture. Add enough flour to make a soft dough. Chill in the fridge for 20 minutes. Take out of fridge and add enough flour to make a good rolling cookie dough.

Snaps: on a floured surface roll out dough and cut into desired shape. Fits about 12 to a tray. Bake at 375F for 5-8 minutes until set.
Soft molasses cookie: hand roll into small walnut sized balls and press down with a fork. Fits about 12 to a tray. Bake at 375F for 5-8 minutes until set.